Wednesday, October 22, 2014

Canyon de Chelly Ultra 2014

With my "A" race behind me (the Grand to Grand Ultra) and a couple of weeks off for rest, I recently participated in my end of season fun run.  The Canyon de Chelly Ultra is only in its second year but what a race this is!  Race Director and former High School cross country coach Shaun Martin has pulled something real special together.  Proceeds go to help Native American runners (over $7,000 this year) and the whole community pitches in to help.  The prize table and participant awards are all representative of Native American crafts and most are hand made.  The logistics of this event are also impressive since it entailed over a year of planning and coordination with numerous federal and tribal entities.

Prize Table (Jacqueline Smith photograph)
I met Shaun back in 2012 during my first foray into stage racing at Desert RATS.  Being from the same general location (southwest) and with my youngest daughter a former XC runner there was much to talk about over the days.  Shaun is a great guy and very proud of his Navajo heritage.

Shaun at Desert RATS 2012
My first exposure to Canyon de Chelly was also back in 2012 while accompanying my wife on an equine expedition (ie hunt club trail ride outing).  I also got in a little training for my first MDS.  Here is a link to an older post.  Having only seeing the upper portion of the canyon I definitely wanted to go back.  This was my chance.

Tim White, my brother Dirk and myself made a road trip out of it (one had to since you really can't fly into Chinley AZ).  This was also a big event for Dirk since he was starting to picking up some experience for his first attempt at the Marathon des Sables next year.  We used this opportunity to go over his gear and packing tips as well as starting to coordinate our travel logistics.

Race check in was low key but the program that evening was intense.  Native song and lore were presented explaining the Navajo connection to running and why it is so important to them as a people.

Race day began early and with a little bit of fall nip in the air.  The race start was only about 300 yards from the hotel which was convenient.  A big bonfire was on hand to take some of the chill off and spirits were high.

At the start (Dirk Reader photograph)

As we prepared for the start, a traditional Navajo blessing was installed upon the group.  A representative male and female runner were chosen to receive this and to my surprise Shaun tapped me to stand in for the male part.  This was quite an honor. 


As the sun peeked over the horizon we started the race with a Navajo tradition of yelling to announce our presence before making our way into the canyon.  Heading east towards the sun we crossed the first sandy miles.  Fortunately it was not too sandy since there had been some rain a couple of days before.  In addition to the sand there were numerous water crossings (only ankle deep) and one steep climb out of the canyon at the turn around point.  Local runners were manning the aid stations and were quite cheerful and helpful even for us grumpy cats towards the end.  The pace was quite fast.

Sand and scenery early in the morning
Overall the race went OK for me.  I was there to have a fun time and see the sights.  I was still not totally recovered from Grand to Grand and while the first half was fast for me the last five miles were tough and saw more walking than I cared to.  Dirk and Tim both finished and were pleased with their performances. 

At the finish
One needs to understand how special running in this canyon is.  Not only is the scenery a knock out (even by southwestern standards) but we were allowed to run unescorted.  At any other time if you wanted to go into Canyon de Chelly you needed to be accompanied by a native guide.  This exception was due to Shaun's hard work and dedication to this race.

Wild Horses (Jacqueline Smith photograph)


Spider Rock from below

I am definitely coming back to this next year!


Monday, October 6, 2014

Blister Kit Suggestions


For those of you how have followed my blogs over the past you know the importance of good foot care.  Proper preparations before the race are important and can not be discounted.  However, what you take to the field with you in support of your stage racing endeavors is also critical.  One needs to have sufficient supplies to get to the finish while not carrying extra weight (or relying on the event medical staff as long lines can be expected).  Through my experiences I have come up with a list of items for your "Blister Kit" that you may find useful and yet not to onerous.  Learn how to use them before you get to the field!

In a 6.75 x 6 in. LOKSAK bag I carry the following

0.5 oz hand sanitizer (I prefer this since it can also be used for hand sanitizing as well as foot sanitizing before blister surgery.  Empty out half of a one ounce bottle or bring 6-8 alcohol prep pads)
1 oz tube triple antibiotic (or bring 4 single use packets)
1 ea small disposable nail file (if you like, cut in half or into thirds)
6 packets  2Toms blister shield powder or your favorite lube
4 ea Band-aids
2 ea 18 gauge x 1 inch hypodermic needle
6-8 ea Tincture of benzoin  swabs or ampules (be sure to double bag these in case one breaks!)
4 ea Tape adhesive remover packets
3 ft 4" Rocktape brand Kinesiology tape (for back taping to prevent pack chafing)
6 ft 2" Rocktape or Strength Tape Kinesiology tape (for heals, foot bottom, etc)
3 ft 1" Strength Tape Kinesiology tape (for toe ends, note you can split 2" in a pinch, just bring more)
1 ea Leatherman "Style" multitool (great little scissors and nail file, also doubles as your knife)


Blister Kit Contents


This should be enough supplies to totally tape up at least two and most likely three times. You may want to down or up size various items based on your needs. The above numbers will most likely have some left over to help out your less informed tent mates - you will be an instant hero!

Blister kit 2013 MDS


 Total weight less the multitool is around 5 oz (140 grams) but well worth it!


The nightly Foot Party at Grand to Grand 2014

I should take a moment to comment on the my multitool of choice for stage racing - the Leatherman Style.  This little wonder has everything you need packed in an ultrasmall (no bigger than a key) package including:
  1. 420HC Knife
  2. Spring-action Scissors
  3. Flat/Phillips Screwdriver
  4. Tweezers
  5. Nail File
I have mine tethered via its small ring to my front pack so it is readily available.  As you can see three of its capabilities directly support foot care including scissors, nail file and tweezers. Very inexpensive too.

Leatherman Style - the perfect stage racing tool


Leatherman Style and tether (top)


Tuesday, August 26, 2014

A Tutorial in Velcro

One of the most asked questions I hear is "How do you attack the Velcro for your gaiters to your shoes?"  This is probably one of the true mysteries of the universe ranking right up there with "Does the light in the refrigerator stay on when the door is closed?"  Hopefully this post will take some of the confusion out of this important aspect of desert running.  It has been a trial and error experience for me developing this procedure and hopefully you will get up on the curve with less frustration.

The overall plan is to SECURELY adhere Velcro hook portion to the circumference of the shoe just above the sole (on the upper) in a professional manner.  Once this is done you will then wish to take the shoes into a cobbler and have them sew over the Velcro in order to assure it will stay in place.  It is likely that just gluing the Velcro would be sufficient but this is a critical piece of race equipment you do not want failures.

What you will need includes:

1. 3/4 inch (2 cm) Velcro (both the hook and loop parts).  You need a sufficient amount to go around both shoes plus at least 6 inches (15cm) extra.  Do not get the adhesive back type, the "sew on" type is best.
2. Scissors
3. 3M Black Super Weatherstrip and Gasket Adhesive (08008) or equivalent. You can get this kind of stuff at the auto supply store.
4. Paper towels
5. Patience

What you need for a Velcro job

NOTE:  This procedure takes time and should be done in short sessions over a day or two.  This will assure a professional looking job that will not let you down.

Starting at the back glue the Velcro around the outside of the shoe.  Do this in short sections in order to keep the Velcro in place while the adhesive dries.  Be sure to coat the the Velcro all the way to the edges with adhesive and let it dry slightly prior to applying to the shoe. This makes application easier.

Start at the back

Work your way around the outside first

When you get to a portion of the shoe where there are natural curves you will need to trim the Velcro so it will lay flat.  To do this either cut an arc or notch out of the inside of the cure (no more than 1/3 of the way thru) and snip the Velcro on the opposite side.  Glue this down and hold in place while it dries

Arc cut out example

Notch cut out example
If there are any protrusions (sole features) in the toe area you may have to cut them off or file them down so the Velcro will lay flat.  Small discontinuities can be taken care of with a build up of adhesive.

Work your way over the toe

Then along the inside

Once the Velcro has been adhered and has set for a day, take your shoes to a cobbler.  Have them sew all the way around the Velcro both at the top and the bottom so it will not come off.  You may have to shop around to find someone to do this.  Talk face-to-face with them to explain the procedure.  They will most likely will be quite interested in what this is for!

Sewed on and done!

Finally, you should take the remaining loop portion of the Velcro and cut two protective strips to place on your new race shoes to keep all sorts of foreign objects out of the hook part when wearing without gaiters.  An example of this would be if you wear them as you travel to your race, or if you are breaking them in some.  Trim as explained above so to get around the curves of your shoes.  Start and end these pieces at the rear of your shoes.  You will have a right and left one obviously.

Good Luck!

Tuesday, June 3, 2014

2015 MDS

The long and short of it is I am signed up.  My brother Dirk has also thrown in with me.  Now I just have to wade through all the bank transfer stuff.

Looking forward to Morocco again!

Wednesday, April 2, 2014

Good Luck 2014 MDS'ers

Many of you are most likely already heading for the desert.  Best of luck and enjoy the event!  Would love to hear how it went for you when you get back.

Friday, October 25, 2013

2014 MDS'ers!

Welcome to my MDS blog.  Hopefully you will find the information contained herein to be of benefit to your attempt.  If you have any questions please comment.

Thursday, May 2, 2013

After Action Revew #2 - What Did Work

Many things worked out well for this event.  I attribute this to detailed planning, testing and defining my requirements up front.  With the exception of my sand goggles I used everything in my kit.  I had nothing extra (except meds) and had no real material needs beyond what I carried.  Below are some highlights and explanations.

Raidlight pack - New bite valve water bottles on shoulder straps worked well.  Pack volume was sufficient.  Front pack for food, camera, road book, etc. worked out nice.  Also allowed for carrying extra water bottle.

Mizuno Cabrakan 3 shoes - Provided excellent protection and support.  Too bad they are extinct in the US.  Velcro sew job was good too.  Many have transitioned to Hoka One One shoes due to cushioning and larger soles.

My gaiters - These were, in a word AWESOME! No failures, no sand, no problems!  Many with off the shelf models were experiencing holes in the toes during the second stage due to rocks.  The material these were made of was no match for the environment.  My ripstop nylon held up to the most brutal use.  Too bad there is a limited market or I would be in business.  I was identifiable on the web cam from a distance because of their unique colors and design.

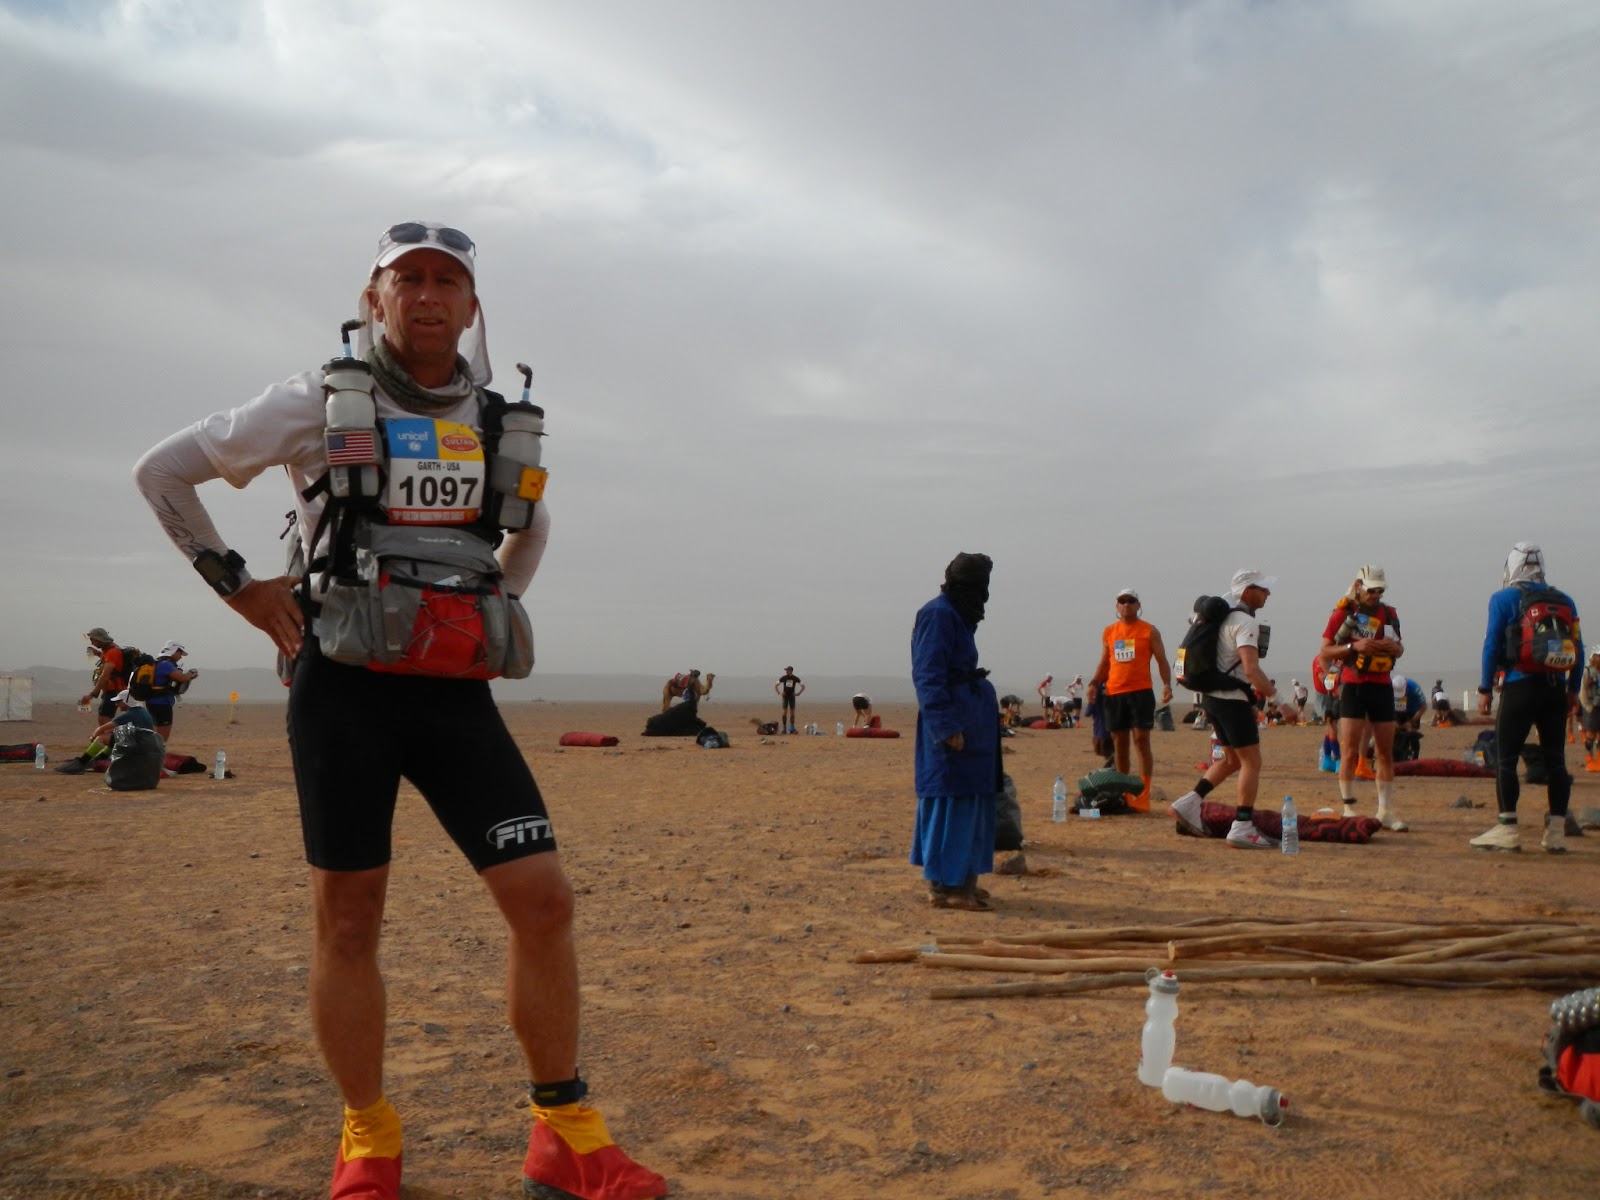
Jocked up and ready to go for the day!

Esbit wing stove, DIY windscreen and MSR Titanium cup (400 ml) - This system was just right in size and at a minimum weight.  It was nice to have a hot cup of coffee and a hot breakfast.  Many others had kettles and stoves weighing three times as much and taking up four times the space.  I was able to get through the event on one box of fuel tablets.

Stove, wind screen and cup in action

Thermorest Neo-air pad - While comfortable and no punctures, I would consider going without a pad or just a small piece in the future.

Garmin Forerunner 101 and lithium batteries - This was nice to track my pace and distances to the next CP.  Lithium batteries lasted very long.  Battery indicator never went below full but I switched them out twice.  Saw one other person there with the same model.  This prevented me from having to carry a solar charger or go without.  If you were into saving weight I would just go with the wrist watch.

Buff - This should be compulsory item (almost everyone carries one).  I used it for neck cooling/sun protection, eye shades at night, stocking cap, dew rag, etc.  All the children along the route and especially at the end covet this multifunctional piece of cloth.

Hat with cape - Salomon brand, XA+ model.  Nice extra shade on the neck.  White of course (along with 900 others).

Zoot cooling sleeves, white - I got this on a whim at the last minute and boy was I glad I did.  These are a must!  While they become quite soiled over the week they do offer a cooling effect and can be doused with water to help out.  I saw too many competitors with second degree sunburns on their arms.

The well equipped MDS'er: Buff, gaiters, hat, Garmin, Zoot sleeves, etc.

Slim Jim's - These little protein sticks kept me going.  Mild and regular were both acceptable.  Many of my tent mates were envious.  I could do a commercial for them and they could sponsor me in the future.

Kensio Tex Gold Tape, silk tape, tincture of benzoin and hypodermic needle - Worked quite well for preventative taping and blister draining.

Hand Sanitizer - 1 oz was quite enough and worked well for foot cleaning/prep prior to blister surgery (follow up with antibacterial ointment).

Zip lock bags - Both zip loc brand for light duty/throw away (food repackaging, road book protection) and Aloksak brand for heavy duty use (passport, first aid, tape kit).  You never have enough of these.

Leatherman style knife - this was perfect in size and scissors were great for taping.

Taping up, note scissors at bottom center

Calorie count/food - 2,900 kcals a day was enough.  I could have dropped to around 2,800 kcal/day but that would have been on the edge.  I made it out with 400 spare calories (one pro bar).  I didn't appear to lose any weight however my metabolism was out of whack for two weeks after my return - I wanted to eat everything in sight!  Food selections were OK.  Enjoyed the custard dessert and disliked the Muesli and porridge options.

Support from my wife Lisa - What can I say, she was there over the months of preparation and she was there at the end.  Even slipped me a beer for the trip back to Ouarzazate!  Thanks honey!

What a support crew!

Which would you choose?